
Affiliate Disclaimer
As an Amazon Associate, we earn from qualifying purchases.
Have you ever experienced the frustration of trying to mix music on your studio monitors, only to be interrupted by an annoying monitor crackling sound? I know I have. As an audio engineer, I’ve spent countless hours tweaking knobs and adjusting levels, only to be thwarted by a pesky interference issue. But don’t worry – there’s hope!
I want to share some of my hard-earned knowledge about studio monitor crackling and provide you with actionable tips to fix this problem once and for all. Whether you’re a seasoned pro or a newbie to the world of audio engineering, understanding the root causes of monitor crackling can help you create better-sounding music and save you a lot of headaches in the process.
So grab a cup of coffee, put on your favorite headphones, and let’s dive into the world of studio monitor crackling. By the end of this post, you’ll have a better understanding of what causes this issue, how to troubleshoot it, and most importantly, how to prevent it from happening again in the future.
Table of Contents
Toggle1. Resolving Studio Monitor Crackling: The Role of Interference and Grounding Issues
When it comes to resolving studio monitor crackling, one of the primary culprits is often interference and grounding issues. Interference can come in many forms, including electrical noise from nearby appliances, radio frequencies, and other electronic equipment. Grounding issues, on the other hand, occur when there is a mismatch between the electrical ground of your studio equipment and that of the power outlet or other devices in your studio.
To understand how interference and grounding issues can lead to monitoring crackling, it’s important to first understand how studio monitors work. Studio monitors are designed to provide accurate and uncolored sound reproduction, allowing you to hear your music as it was intended. To achieve this, they rely on a variety of sensitive electronics, including amplifiers, drivers, and crossovers, which can be easily affected by outside interference.
Interference can be caused by a variety of factors, including the presence of nearby electronics and electrical equipment, as well as radio frequencies and other sources of electromagnetic interference (EMI). In some cases, interference can even be caused by the positioning of your studio monitors, with certain angles and orientations causing the amplifiers and drivers to pick up unwanted noise.
Grounding issues can also be a major contributor to monitoring crackling. In simple terms, grounding refers to the electrical connection between your studio equipment and the earth. When the grounding of your studio equipment doesn’t match that of other devices in your studio, it can create a difference in electrical potential, leading to a variety of problems, including unwanted noise and interference.
To resolve interference and grounding issues and reduce monitor crackling, there are several steps you can take. First, try repositioning your studio monitors to reduce the likelihood of interference. This might involve moving them further away from other electronic equipment or repositioning them to avoid picking up unwanted radio frequencies.
Another important step is to ensure that your studio equipment is properly grounded. This might involve checking the electrical outlets in your studio to ensure that they are properly grounded or investing in a grounding cable or other grounding device to ensure that your equipment is properly connected to the earth.
2. Troubleshooting Monitor Crackling: Is it Blown Drivers or Faulty Electronics?
If you’re experiencing monitor crackling in your studio setup, there are several potential causes to consider. Two of the most common culprits are blown drivers and faulty electronics, both of which can lead to unwanted noise and distortion in your studio monitors.
Blown drivers are a frequent cause of monitor crackling, particularly if you’re hearing the noise at higher volumes. Drivers are the components responsible for producing sound in your studio monitors, and if one or more of them has been damaged or blown out, it can lead to crackling or other unwanted noise. If you suspect that a blown driver is the cause of your monitor crackling, you’ll need to open up the monitor and inspect the drivers to see if they’re damaged or not functioning properly. In some cases, a blown driver may be repairable, while in other cases you may need to replace the entire driver or monitor.
Faulty electronics are another potential cause of monitor crackling. This can include everything from faulty wiring to malfunctioning amplifiers, capacitors, or other electronic components. If you suspect that faulty electronics are to blame for your monitor crackling, it’s important to take your monitor to a qualified technician or repair shop to diagnose and fix the issue. Attempting to repair or replace faulty electronics on your own can be dangerous and may further damage your equipment.
Prevention is key when it comes to blown drivers and faulty electronics. To minimize the risk of blown drivers, make sure to avoid playing music or other audio at excessively high volumes for extended periods, as this can damage the drivers and other components in your monitors. Regularly inspecting and maintaining your equipment can also help to prevent issues with faulty electronics, as can investing in high-quality, reliable monitors and other studio gear.
3. Common Causes of Monitor Crackling: Volume and Level Issues
I have encountered many instances of monitor crackling and have found that volume and level issues are a common cause. In this article, we will explore the various reasons behind this issue and discuss how to resolve it.
One of the primary causes of monitor crackling is when the volume is set too high. If your studio monitor’s volume is set to maximum, it can cause the speaker to reach its physical limit and produce crackling noises. This can damage your monitor over time and impact the overall quality of your sound output.
Similarly, level issues can also lead to monitor crackling. For instance, if your gain is set too high, it can cause distortion and crackling in your studio monitor. The same is true for the level control on your audio interface. Setting it too high can cause the output to clip and produce crackling noises.
To resolve these issues, you should adjust your levels and volume settings appropriately. Start by reducing the volume of your studio monitor and audio interface to a reasonable level. You should also ensure that your gain settings are adjusted correctly to avoid overloading your audio interface and monitor.
Another solution is to use a limiter or compressor to control your audio levels. This will help prevent your audio levels from going too high and causing distortion and crackling. You can also use a low-pass filter to remove any high-frequency content that might cause crackling in your monitor.
It’s also important to check your cables and connections. Loose or damaged connections can cause noise and crackling in your studio monitor. So, make sure to check all cables and connections, including those on your audio interface, monitor, and any external gear that you may be using.
4. Poor Quality Cables or Connectors
To accurately reproduce sound, it’s crucial to have cables and connectors that are of high quality and properly maintained. We’ll take a closer look at how poor-quality cables and connectors can lead to monitoring crackling, and what you can do to prevent it.
First and foremost, it’s important to understand that not all cables and connectors are created equal. Inexpensive cables or connectors that are poorly constructed can result in signal loss, electrical interference, and other issues that can cause crackling and distortion in your studio monitors. Additionally, cables that have become damaged or frayed over time can create intermittent connections that can also lead to monitor crackling.
One of the most effective ways to prevent monitor crackling due to poor-quality cables and connectors is to invest in high-quality equipment. This may mean spending a bit more money upfront, but it can save you a lot of frustration and headache down the line. Look for cables and connectors that are made with high-quality materials, have strong connections, and are properly shielded to prevent electrical interference.
In addition to investing in high-quality cables and connectors, it’s important to properly maintain them to prevent monitor crackling. This means regularly inspecting your cables and connectors for signs of wear or damage, and replacing them if necessary. You should also ensure that your cables and connectors are properly seated and securely connected at all times.
Another potential cause of monitor crackling due to poor-quality cables and connectors is improper grounding. Grounding is a critical aspect of any audio setup, and it helps to prevent unwanted noise and interference. If your cables or connectors are not properly grounded, it can create electrical noise that can cause crackling and distortion in your studio monitors. To prevent this, make sure that all of your cables and connectors are properly grounded and connected to a reliable power source.
5. Environmental Factors That Cause Studio Monitor Crackling
Environmental factors can have a significant impact on the performance of your studio monitors and can often be a cause of crackling and other noise issues. Here are some environmental factors that can cause studio monitor crackling and what you can do to minimize their impact:
Humidity: High levels of humidity can cause moisture to accumulate inside your studio monitors, leading to crackling and other noise issues. To reduce the impact of humidity, you can use dehumidifiers in your studio or keep your monitors in a dry, air-conditioned environment.
Temperature: Extreme temperatures can also impact the performance of your studio monitors, causing them to crackle or distort. Make sure to keep your monitors away from sources of heat, such as radiators or direct sunlight, and keep them in a temperature-controlled environment.
Electrical Interference: Electrical interference from nearby electronics or power sources can also cause the studio monitor to crackle. Make sure to keep your monitors away from sources of electrical interference, such as other electronic devices, and use high-quality power strips or surge protectors to help minimize the impact of electrical noise.
Acoustics: The acoustics of your studio can also impact the performance of your studio monitors. Poor room acoustics can cause reflections and other unwanted noises that can lead to cracking and other issues. To minimize the impact of poor acoustics, you can use acoustic treatment products, such as absorptive panels or diffusers, to help improve the sound quality of your studio.
Vibration: Vibrations from nearby sources, such as heavy foot traffic or construction, can also cause the studio monitor to crackle. To minimize the impact of vibrations, you can use isolation pads or stands to decouple your monitors from your desk or other surfaces, reducing the likelihood of unwanted vibrations and other noise.
By being aware of these environmental factors and taking steps to minimize their impact, you can greatly reduce the likelihood of crackling and other noise issues in your studio monitors. This can help ensure that you’re always getting the best possible sound quality and that your monitors are functioning at their best.
6. Dealing with Monitor Crackling Caused by Aging Monitors
If you’ve been using your studio monitors for a while, you may have noticed that they don’t sound quite as good as they used to. Perhaps you’re hearing crackling or other distortion that wasn’t there before. While there could be many reasons for this, one common cause is simply that your monitors are getting old. In this article, we’ll explore some of the common reasons why aging monitors can cause crackling, and what you can do to address the issue.
The Effects of Age on Studio Monitors: Over time, the components in your studio monitors can begin to wear out, which can lead to a variety of issues, including crackling. For example, the voice coil in your monitor’s speaker can become worn, causing it to produce a distorted or crackling sound. Similarly, the capacitors in your monitor’s crossover network can dry out or fail, leading to crackling or other noise.
In addition to these specific components, general wear and tear on your monitors can also cause problems. Over time, the physical structure of your monitors can become compromised, which can affect their performance. For example, the cones in your speakers can become warped or misshapen, causing distortion or crackling. Similarly, the housing of your monitors can become loose or damaged, leading to vibrations and other unwanted noise.
What You Can Do About It: If you suspect that your studio monitors are causing crackling due to age-related issues, there are several things you can do to address the problem. The first step is to identify the specific component or components that are causing the issue. This may require taking apart your monitors and inspecting their individual components.
Once you’ve identified the problem, you’ll need to decide whether to repair or replace the affected components. In some cases, such as with damaged cones or housing, replacement may be your only option. However, in other cases, such as with worn voice coils or capacitors, you may be able to repair the component yourself or with the help of a professional.
Another option to consider is simply upgrading to new monitors. While this can be a more expensive solution, it may be worth it if your monitors are old and no longer performing at their best. New monitors will not only sound better, but they will also have a longer lifespan, allowing you to avoid issues related to aging components for a longer period of time.
Conclusion: Dealing with monitor crackling caused by aging monitors can be frustrating, but it’s important to remember that it’s a common issue that can be addressed. By understanding the effects of age on your monitors and taking steps to repair or replace affected components, you can continue to enjoy high-quality sound reproduction from your studio monitors for years to come.
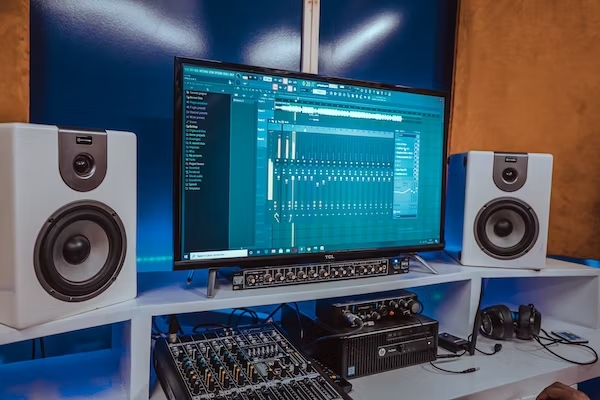
7. Resolving Monitor Crackling: Addressing Both Hardware and Software Issues
Monitor crackling can be a frustrating and persistent problem for anyone who relies on studio monitors to create and mix music. While a variety of factors can contribute to monitoring crackling, two of the most common causes are hardware issues and software issues.
Hardware issues can include a range of factors, such as faulty cables, damaged drivers, or problems with the power source. To address hardware-related causes of monitor crackling, it’s important to take a systematic approach to troubleshoot. Begin by inspecting all of the cables and connections in your studio setup, looking for signs of wear or damage. If you find any damaged cables, replace them with high-quality, shielded cables designed for audio use.
Next, inspect the drivers in your studio monitors, looking for signs of damage or wear. If you notice any damage or distortion, it may be necessary to replace the driver. Additionally, make sure that your studio monitors are receiving a clean, stable power supply, free from voltage fluctuations or other electrical noise.
If none of these steps resolve the issue, it may be time to consider upgrading your studio monitors to a higher-quality model that is designed to provide clean, accurate sound reproduction without any unwanted distortion or noise.
Software issues can also contribute to monitoring crackling, and it’s important to take a systematic approach to troubleshooting to identify and address these issues. Outdated drivers or firmware can create compatibility issues that lead to monitor crackling, so it’s important to regularly check for updates and patches from the manufacturer’s website.
Digital audio workstations (DAWs) can also create compatibility issues with your studio monitors. To address this, try disabling any unnecessary plugins or effects to see if this resolves the issue. Additionally, reducing the number of active tracks or adjusting the buffer size in your DAW can help reduce latency and minimize the likelihood of monitor crackling.
It’s also worth noting that some software applications may require specific hardware configurations or settings to function properly. For example, certain DAWs may require a specific buffer size or sample rate to work optimally with your studio monitors. Checking the documentation for your software application and ensuring that your hardware is properly configured can go a long way toward reducing monitor crackling.
By taking a systematic approach to troubleshooting and addressing both hardware and software issues that can contribute to monitoring crackling, you can help ensure that your studio monitors provide clear, accurate sound reproduction without any unwanted noise or distortion. With the right tools and techniques, you can create and mix music with confidence, knowing that you’re hearing your music accurately and without any unwanted interference.
Conclusion
studio monitor crackling can be caused by a wide range of factors, from interference and grounding issues to poor-quality cables and aging monitors. However, by understanding the common causes of this issue and taking proactive steps to address them, you can ensure that you’re always hearing your music as accurately and clearly as possible. Remember to keep your studio properly grounded, use high-quality cables and connectors, and monitor your volume and levels to prevent distortion and other forms of unwanted noise. With these tips in mind, you’ll be well on your way to creating music that sounds great on any system.
These are six great full accessories for fixing studio monitor crackling
This is a contact cleaner that helps remove corrosion and other contaminants from the electrical contacts in your studio monitors, reducing the likelihood of crackling and other noise.

These high-quality XLR cables are designed to deliver a clean, noise-free signal from your studio gear to your monitors, minimizing the chance of interference that can lead to crackling.

These studio monitors offer clear, accurate sound reproduction and are designed to minimize distortion and other noise that can cause crackling.

These monitor stands help to decouple your studio monitors from your desk or other surfaces, reducing vibrations and other noise that can lead to crackling.

This is a device that helps eliminate ground loop hum and other electrical noise that can cause crackling and other unwanted noise in your studio monitors.

This is a device that helps to convert unbalanced signals to balanced signals, reducing the likelihood of interference and other noise that can cause crackling in your studio monitors.

By using these accessories in combination with the tips and techniques outlined in our blog post, you can greatly reduce the likelihood of crackling and other noise in your studio monitors, leading to clearer, more accurate sound reproduction and a better listening experience overall.


Thank You very much this goes a long way to encourage me.
Here are some helpful hints for novice blog writers:
Define your niche: Choose a specific topic or niche that you’re passionate about and want to write about. This will help you attract a targeted audience and establish yourself as an expert in that particular area.
Research your audience: Understand who your target audience is and what they’re interested in. This will help you tailor your content to their needs and preferences.
Develop a unique voice: Find your writing style and tone that sets you apart from other bloggers. Be authentic and let your personality shine through your writing.
Plan your content: Create an editorial calendar to organize your blog posts. Plan and brainstorm ideas so that you always have a list of topics to write about. This will help you stay consistent and avoid writer’s block.
Write compelling headlines: Craft catchy and attention-grabbing headlines for your blog posts. A persuasive headline can entice readers to click and read your content.
Focus on quality content: Prioritize creating high-quality, informative, and engaging content. Make sure your posts provide value to your readers and solve their problems or answer their questions.
Use visuals: Incorporate relevant images, infographics, or videos in your blog posts. Visual content can enhance the reader’s experience and make your blog more appealing.
Keep paragraphs and sentences short: Break up your content into small paragraphs and use concise sentences. This makes it easier for readers to scan and digest your content, primarily online.
Proofread and edit: Always proofread your blog posts before publishing them. Check for spelling and grammar errors, as well as overall readability. Editing your content ensures it’s polished and professional.
Engage with your readers: Respond to comments on your blog and interact with your readers on social media. Building a community and fostering relationships with your audience can help grow your blog and increase its reach.
Promote your blog: Share your blog posts on social media platforms, participate in relevant online communities or forums, and consider guest posting on other blogs. Promoting your blog helps increase its visibility and attract more readers.
Be consistent: Regularly publish new content on your blog. Consistency is critical to building an audience and keeping readers engaged.
Remember, blogging takes time and effort to gain traction. Stay persistent, learn from feedback, and continue to improve your writing skills. Good luck with your blog!