
Affiliate Disclaimer
As an Amazon Associate, we earn from qualifying purchases.
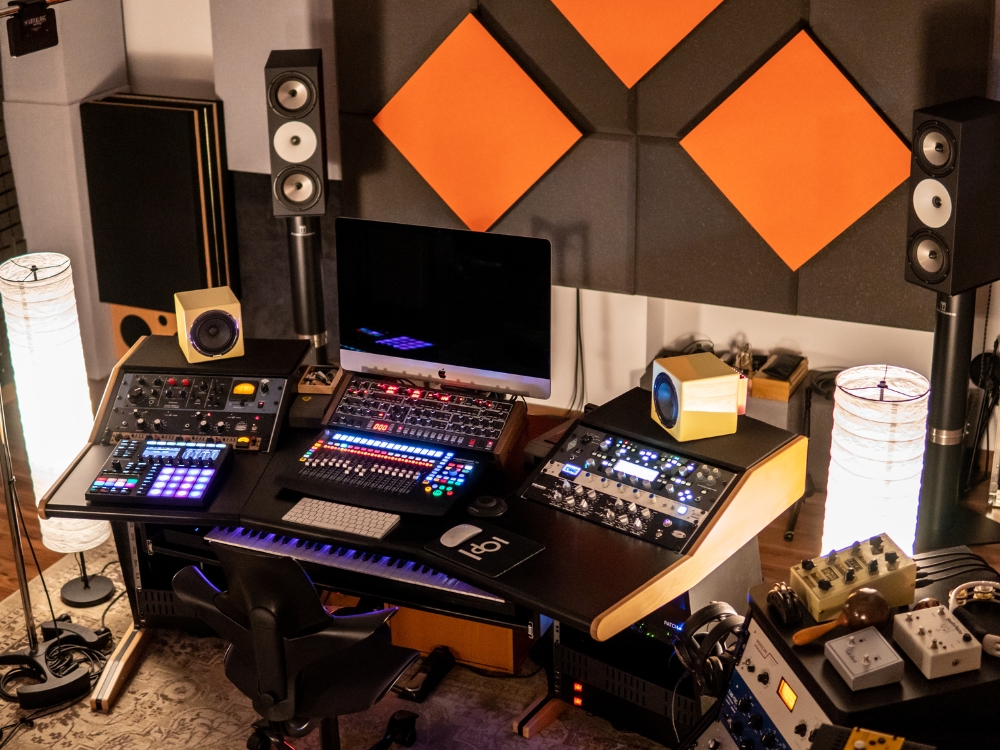
If you’re setting up a professional recording or mixing studio, connecting your studio monitors to an audio interface is an essential step. Studio monitors are designed to deliver accurate sound reproduction, while an audio interface acts as a bridge between your computer and the monitors. This connection is critical for achieving high-quality sound, whether you’re recording or mixing music. In this article, we’ll show you how to connect your studio monitors to your audio interface, providing you with the knowledge you need to take your music production or audio engineering to the next level.
Table of Contents
ToggleWhat is an audio interface, and why do you need one to connect studio monitors?
An audio interface is a piece of hardware that connects your computer to your studio monitors and other audio equipment. It typically features inputs for microphones, instruments, and other sound sources, as well as outputs for headphones and studio monitors. The main function of an audio interface is to convert analog audio signals to digital signals that can be processed by your computer, and vice versa.
So, why do you need an audio interface to connect studio monitors? The answer lies in the fact that most computers are not designed to handle professional audio equipment on their own. The audio jacks on a computer are typically designed for consumer-grade headphones and speakers and are not optimized for the high-quality, low-latency audio signals required for recording and mixing music.
By using an audio interface, you can bypass the limitations of your computer’s built-in audio hardware and take advantage of the superior sound quality and low latency offered by a professional audio interface. Additionally, an audio interface provides dedicated volume control for your studio monitors, allowing you to adjust the output levels independently from your computer’s overall volume.
What are studio monitors, and how do they differ from regular speakers?
Studio monitors are a type of speaker designed specifically for use in professional audio production settings, such as recording studios or home studios. They are different from regular speakers in a few key ways, which deliver lots of value to producers and engineers.
First, studio monitors are designed to deliver a more accurate and neutral sound than regular speakers. This means that they are designed to reproduce sound as faithfully as possible, without adding any extra coloration or distortion that could alter the mix or recording. This is important because accurate sound reproduction is crucial for making informed decisions during the mixing and mastering process.
Second, studio monitors are typically designed to have a flatter frequency response than regular speakers. This means that they are designed to reproduce sound across the entire frequency range (from bass to treble) as evenly as possible. This is important because it allows producers and engineers to hear all of the details in the mix, rather than having certain frequencies emphasized or de-emphasized.
Finally, studio monitors are often designed to have a higher dynamic range than regular speakers. This means that they can handle a wider range of sound levels without distorting or clipping. This is important because it allows producers and engineers to hear the mix at different volume levels, which is crucial for making informed decisions about the overall balance and impact of the mix.
What types of cables and connections can you use to connect studio monitors to an audio interface?
When connecting studio monitors to an audio interface, you have a few different options for cables and connections. Here are the most common types:
XLR cables: XLR cables are a popular choice for connecting studio monitors to an audio interface. They are balanced cables that help minimize noise and interference, making them ideal for professional audio applications. XLR cables are often used for connecting studio monitors with XLR inputs to an audio interface with XLR outputs.
TRS cables: TRS (tip-ring-sleeve) cables are also a popular option for connecting studio monitors to an audio interface. They are balanced cables that are designed to minimize noise and interference. TRS cables are often used for connecting studio monitors with TRS inputs to an audio interface with TRS outputs.
RCA cables: RCA cables are a common choice for connecting consumer audio equipment, but they can also be used to connect studio monitors to an audio interface. RCA cables are typically unbalanced, so they may be more susceptible to noise and interference than XLR or TRS cables. However, if your studio monitors have RCA inputs, and your audio interface has RCA outputs, using RCA cables is a simple and inexpensive option.
Digital connections: Some audio interfaces and studio monitors support digital connections such as S/PDIF or AES/EBU. These connections transmit audio data digitally, which can help reduce noise and interference. However, to use digital connections, both the audio interface and studio monitors need to support the same type of connection.
When selecting cables for your studio monitor setup, it’s important to choose high-quality cables that are well-shielded to minimize interference and noise. The length of the cable can also affect the signal quality, so it’s best to use cables that are the appropriate length for your setup.
What are the best practices for setting up and configuring your audio interface for optimal sound quality?
Here are some best practices for setting up and configuring your audio interface for optimal sound quality:
Use quality cables: Invest in high-quality audio cables to ensure the best possible sound quality. Low-quality cables can introduce noise and interference, negatively impacting the sound of your recordings and mixes.
Set the sample rate and bit depth correctly: Your audio interface’s sample rate and bit depth settings affect the quality and clarity of your recordings and mixes. Choose the highest possible settings that your audio interface and computer can handle to achieve the best sound quality.
Set the buffer size correctly: The buffer size determines how much audio data is stored in the buffer before it is sent to your computer. A smaller buffer size reduces latency but can cause audio glitches, while a larger buffer size increases latency but provides a more stable audio stream. Experiment with different buffer sizes to find the optimal setting for your system.
Check for driver updates: Ensure that your audio interface’s drivers are up to date to avoid compatibility issues and improve performance.
Use balanced connections: If your audio interface and studio monitors support balanced connections, use them to reduce noise and interference.
Calibrate your studio monitors: Use a sound level meter or software to calibrate your studio monitors to ensure they are producing accurate and consistent sound.
Consider acoustic treatment: Use acoustic treatment, such as acoustic panels or bass traps, to minimize unwanted reflections and improve the overall sound quality of your studio.
By following these best practices, you can set up and configure your audio interface for optimal sound quality, ensuring that your recordings and mixes sound their best. These steps can also help you avoid common issues and improve your workflow, making your music production or audio engineering more efficient and enjoyable.
How do you troubleshoot common issues when connecting studio monitors to an audio interface?
When connecting studio monitors to an audio interface, you may run into common issues that can affect the sound quality or prevent the monitors from working altogether. Here are some troubleshooting tips to help you address these issues:
Check your cables: One of the most common issues with connecting studio monitors to an audio interface is using the wrong cables or having faulty cables. Make sure that you’re using the correct cables and that they’re in good working condition.
Check your connections: Ensure that your cables are securely plugged into both your audio interface and your studio monitors. Loose connections can cause audio issues, including hissing, crackling, or no sound at all.
Check your audio settings: Ensure that your audio interface is set up correctly in your audio software or DAW. Check that the audio settings are configured to output audio to your studio monitors and that the volume levels are adjusted appropriately.
Check your power supply: Make sure that your audio interface and studio monitors are properly powered. Some audio interfaces may require an external power supply, while others can be powered via USB. Check your manufacturer’s instructions to ensure you’re using the correct power supply.
Check for interference: Sometimes, external factors like electrical interference can affect the sound quality of your studio monitors. Keep your audio interface and studio monitors away from other electronic devices and sources of interference like Wi-Fi routers, cell phones, or fluorescent lights.
What are some best practices for positioning and calibrating your studio monitors to achieve the most accurate sound reproduction?
Optimal listening position: When setting up your studio monitors, it’s important to start with an optimal listening position. This is the sweet spot where you’ll be sitting when you’re listening to your music. To find this spot, sit in the center of your room and imagine an equilateral triangle between your head and the two monitors. This should be the same distance from your head to each monitor. Adjust your monitor stands or speaker placement until you find the optimal listening position.
Monitor height: The height of your studio monitors can affect the accuracy of sound reproduction. Generally, you want the tweeter (the smaller speaker on the top) to be at ear level. If your monitors are too high or too low, you may need to adjust the height of your stands or use isolation pads.
Distance between monitors: The distance between your studio monitors can also affect the sound. Generally, you want the monitors to be at an equal distance from your listening position, forming an equilateral triangle. If the distance is too far or too close, the stereo image and balance may be off.
The angle of the monitors: The angle of your studio monitors can also affect the accuracy of the sound reproduction. You want the monitors to be angled slightly towards your ears, typically around 15 to 30 degrees. This ensures that you’re hearing the sound directly from the monitors and not reflected off walls or other surfaces.
Calibration: After setting up your monitors in the optimal position, it’s important to calibrate them for accurate sound reproduction. This involves adjusting the volume, frequency response, and phase to ensure that the sound is balanced and neutral. You can use room correction software or tools like pink noise generators and frequency analyzers to help with this process.
Test your setup: Once you’ve calibrated your monitors, it’s important to test your setup with a variety of music and other audio sources. This will help you identify any issues with the sound and fine-tune your setup for optimal performance.
What are some additional tips and tricks for getting the most out of your studio monitors and audio interface?
Keep your cables tidy: Messy cables can not only look unprofessional but can also introduce unwanted noise into your signal chain. Keep them organized and untangled to ensure a clean signal flow. And remember, cable management is not just for neat freaks – it’s for everyone who cares about good sound quality and wants to avoid tripping over cables!
Use isolation pads: Isolation pads can help reduce vibrations and prevent unwanted resonance between your studio monitors and your desk or stands. They’re an affordable solution that can make a big difference in sound quality. And no, using a pile of pancakes as isolation pads won’t give you a warm, buttery sound – unless you want ants in your studio!
Optimize your room acoustics: Your studio monitors can only deliver accurate sound if your room is acoustically treated. Add bass traps and acoustic panels to reduce unwanted reflections and standing waves. And no, covering your walls with egg cartons won’t make your studio sound “eggstraordinary” – unless you want your mix to sound like it was recorded in a chicken coop!
Take breaks: Your ears can get fatigued from prolonged listening, so take regular breaks to rest them. Step outside, get some fresh air or listen to music in a different environment. And no, blasting heavy metal music during your break won’t rejuvenate your ears – unless you want to end up with a headache!
In conclusion,
Connecting your studio monitors to an audio interface is an essential step in achieving accurate and high-quality sound reproduction in your recordings and mixes. By following the key points we covered, including understanding what an audio interface is, the different types of cables and connections you can use, and how to optimize your audio interface and studio monitors for the best sound quality, you can achieve the professional results you’re looking for.
In addition to these key points, we also covered some fun and practical tips and tricks, such as keeping your cables tidy, using isolation pads, optimizing your room acoustics, and taking breaks to rest your ears. While some of these tips may sound like jokes, they’re all meant to help you achieve the best possible sound while having fun in the process.
By implementing these strategies, you’ll be well on your way to creating mixes that sound great on any system. So go forth, connect those studio monitors to your audio interface, and enjoy the sweet sound of success!
Enhance Your Monitoring Experience: Must-Have Accessories for Studio Monitors
Automate Your Studio Monitor Shutdowns and Save Energy

Reduce Vibrations and Improve Sound Quality

Protect Your Monitors from Vibrations and Enhance Performance

Keep Your Studio Environment Clean and Free of Dust and Allergens

Ensure Accurate and Consistent Sound Across Different Playback Systems


