Do studio monitors need an audio interface?

Are you asking your self do studio monitors need an audio interface? We uncover the truth about whether studio monitors require an audio interface. Discover the powerful reasons behind the necessity of audio interfaces for optimal performance and unlock the full potential of your studio monitors.

Affiliate Disclaimer 

As an Amazon Associate, we earn from qualifying purchases.

Do studio monitors need an audio interface?  When it comes to setting up your home studio, it’s important to have all the necessary equipment to ensure that your audio quality is optimal.

While studio monitors are essential, it’s often debated whether or not an audio interface is necessary for the best performance. While it’s true that studio monitors can function without an audio interface, it’s highly recommended to use one for several reasons. 

Here are some reasons why using an audio interface with studio monitors is advantageous

Sound Quality

Audio interfaces are designed to convert digital audio signals from your computer or recording device into high-quality analog signals that can be accurately reproduced by studio monitors. This ensures that you hear the audio with maximum fidelity and accuracy, allowing for precise monitoring during the mixing and mastering processes.

Signal Routing and Connectivity

Audio interfaces provide multiple input and output options, allowing you to connect various devices and instruments to your studio monitors. They offer balanced connections, such as XLR and TRS, which help reduce noise and interference. This flexibility in signal routing allows for a versatile and efficient audio production setup.

Gain Control and Preamps

Many audio interfaces come equipped with preamps, which amplify the low-level audio signals from microphones or instruments to a suitable level for recording or monitoring. Preamps play a vital role in capturing audio accurately and minimizing noise and distortion. Additionally, audio interfaces offer to gain control, allowing you to adjust input levels precisely.

Latency Reduction

Audio interfaces typically include dedicated drivers that optimize data transfer and minimize latency. This is crucial for real-time monitoring during recording and mixing sessions. By using an audio interface, you can achieve low-latency monitoring, ensuring that the audio playback is in sync with your actions.

Additional Features and Flexibility

Audio interfaces often come with additional features such as phantom power for condenser microphones, MIDI connectivity, direct monitoring capabilities, DSP effects, and more. These features expand the capabilities of your studio setup and offer greater control over your audio production.

Can I use studio monitors without audio interface?

 
Yes, you can use studio monitors without an audio interface look at the (best m audio studio monitors). Studio monitors can be connected directly to your computer’s audio output or a mixer, allowing you to listen to audio playback.
 
However, using an audio interface with studio monitors offers several advantages, including improved sound quality, signal routing options, gain control, reduced latency, and additional features. It is recommended to use an audio interface for optimal performance and to unlock the full potential of your studio monitors.

Can I connect studio monitors directly to my computer without an audio interface?

Yes, it is possible to connect studio monitors directly to your computer without an audio interface. Most computers have built-in audio outputs, such as headphone jacks or line outputs, that can be used to connect your studio monitors. You can typically use standard audio cables, such as 3.5mm TRS or RCA cables, to establish the connection.

However, there are a few considerations to keep in mind when connecting studio monitors directly to your computer:

Sound Quality

The built-in audio outputs on computers may not provide the same level of sound quality and fidelity as an audio interface. They are designed for general consumer use and may have limitations in terms of dynamic range, signal clarity, and noise levels.

Connectivity Options

Directly connecting studio monitors to your computer limits your connectivity options. You may only have a single stereo output available, which means you won’t be able to connect multiple devices or instruments simultaneously.

Signal Level and Control

Depending on the output capabilities of your computer, you may have limited control over the signal level. You won’t have dedicated gain control or preamp options that are typically available on audio interfaces, which can impact the ability to adjust levels accurately.

Latency and Performance

Directly connecting studio monitors to your computer may result in higher latency compared to using an audio interface. This latency can be problematic when recording or monitoring audio in real time, as there may be a noticeable delay between the input and output.

While it is possible to connect studio monitors directly to your computer, using an audio interface is generally recommended for improved sound quality, better connectivity options, gain control, latency reduction, and overall enhanced performance. An audio interface provides a dedicated and optimized solution specifically designed for professional audio production.

Tips and Tricks for Studio Monitors and Audio Interfaces💡

do studio monitors need audio interface 1

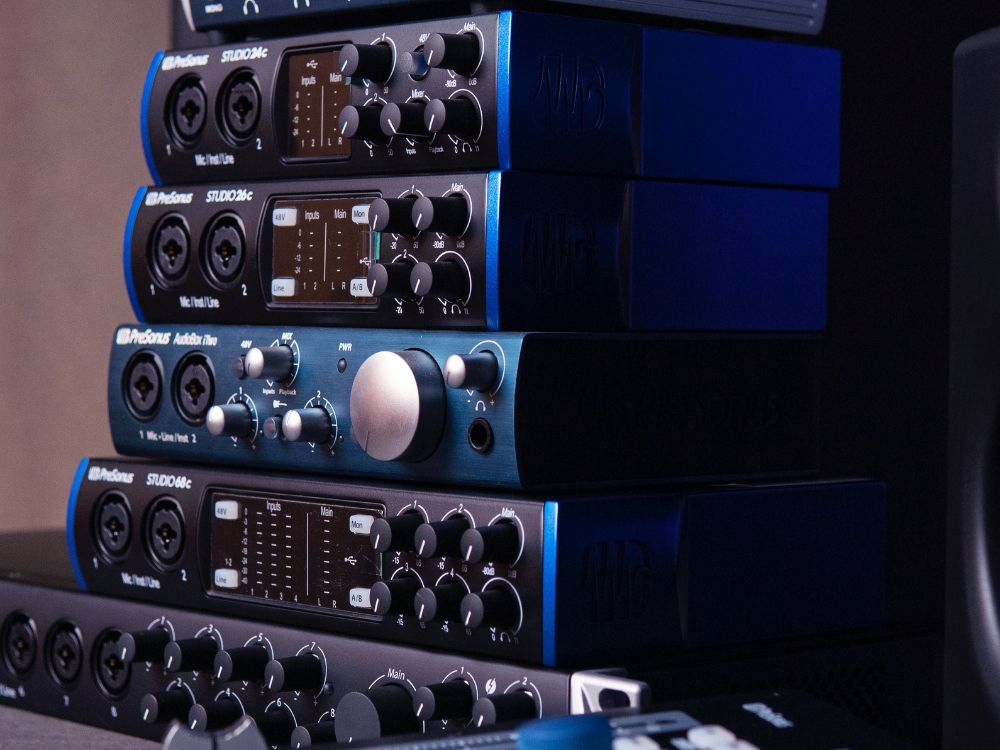
Choose a High-Quality Audio Interface 💡

Investing in a reputable audio interface with good converters and preamps can significantly enhance the sound quality of your studio monitors. Look for interfaces known for their transparent audio reproduction and low noise floor.

Opt for Balanced Connections 💡

Balanced connections, such as XLR or TRS, offer better noise rejection and signal integrity compared to unbalanced connections like RCA. Utilizing balanced cables and connections can help preserve the quality of the audio signal and reduce potential interference.

Set Appropriate Gain Levels 💡

Proper gain staging is crucial for achieving optimal sound quality. Ensure that the gain levels on your audio interface are appropriately set to avoid clipping or distortion. Experiment with different gain settings to find the sweet spot that provides a clean and balanced audio signal.

Use Proper Cabling 💡

The quality of the cables used to connect your audio interface to your studio monitors can impact sound quality. Choose high-quality cables with shielding to minimize noise and interference. Avoid excessively long cables, as they can introduce signal degradation over longer distances.

Positioning and Room Acoustics 💡

Properly positioning your studio monitors and considering room acoustics can greatly impact sound quality. Experiment with speaker placement, monitor isolation pads, and acoustic treatment to reduce unwanted reflections, standing waves, and bass build-up, resulting in more accurate monitoring.

Utilize Monitor Calibration 💡

Many audio interfaces come with calibration software or measurement tools that allow you to fine-tune the frequency response of your studio monitors. Utilize these tools to ensure accurate monitoring and compensate for any frequency irregularities in your listening environment.

Consider Digital Signal Processing (DSP) 💡

Some audio interfaces offer built-in DSP effects, EQ, or room correction capabilities. Utilizing these features can help optimize the sound quality of your studio monitors and tailor the audio to suit your listening preferences or room characteristics.

Keep Firmware and Software Updated 💡

Regularly check for firmware updates and software drivers for your audio interface. Manufacturers often release updates that can improve performance, address bugs, and enhance sound quality. Staying up-to-date ensures you are benefiting from the latest improvements.

Remember, while an audio interface is recommended for optimal sound quality with studio monitors, implementing these tips and tricks can further enhance your listening experience and help you achieve accurate and high-fidelity monitoring.

Enhance Your Monitoring Experience: Must-Have Accessories for Studio Monitors

Automate Your Studio Monitor Shutdowns and Save Energy

q? encoding=UTF8&ASIN=B00MWHQZX0&Format= SL250 &ID=AsinImage&MarketPlace=US&ServiceVersion=20070822&WS=1&tag=soundsiq 20&language=en US

BN-LINK 8 Outlet Surge Protector

4.7/5

Reduce Vibrations and Improve Sound Quality

q? encoding=UTF8&ASIN=B01BEKVB0W&Format= SL250 &ID=AsinImage&MarketPlace=US&ServiceVersion=20070822&WS=1&tag=soundsiq 20&language=en US

Professional Acoustic Foam Panels

4.2/5

Protect Your Monitors from Vibrations and Enhance Performance

q? encoding=UTF8&ASIN=B07D7K4Q54&Format= SL250 &ID=AsinImage&MarketPlace=US&ServiceVersion=20070822&WS=1&tag=soundsiq 20&language=en US

IsoAcoustics ISO-155 Studio Monitor Stands

4.6/5

Keep Your Studio Environment Clean and Free of Dust and Allergens

q? encoding=UTF8&ASIN=B07VVK39F7&Format= SL250 &ID=AsinImage&MarketPlace=US&ServiceVersion=20070822&WS=1&tag=soundsiq 20&language=en US

LEVOIT Air Purifier

4.7/5

Ensure Accurate and Consistent Sound Across Different Playback Systems

q? encoding=UTF8&ASIN=B07M6KPJ9K&Format= SL250 &ID=AsinImage&MarketPlace=US&ServiceVersion=20070822&WS=1&tag=soundsiq 20&language=en US

Datacolor SpyderX Pro – Monitor Calibration

4.4/5

Leave a Reply

Your email address will not be published. Required fields are marked *